Maps management
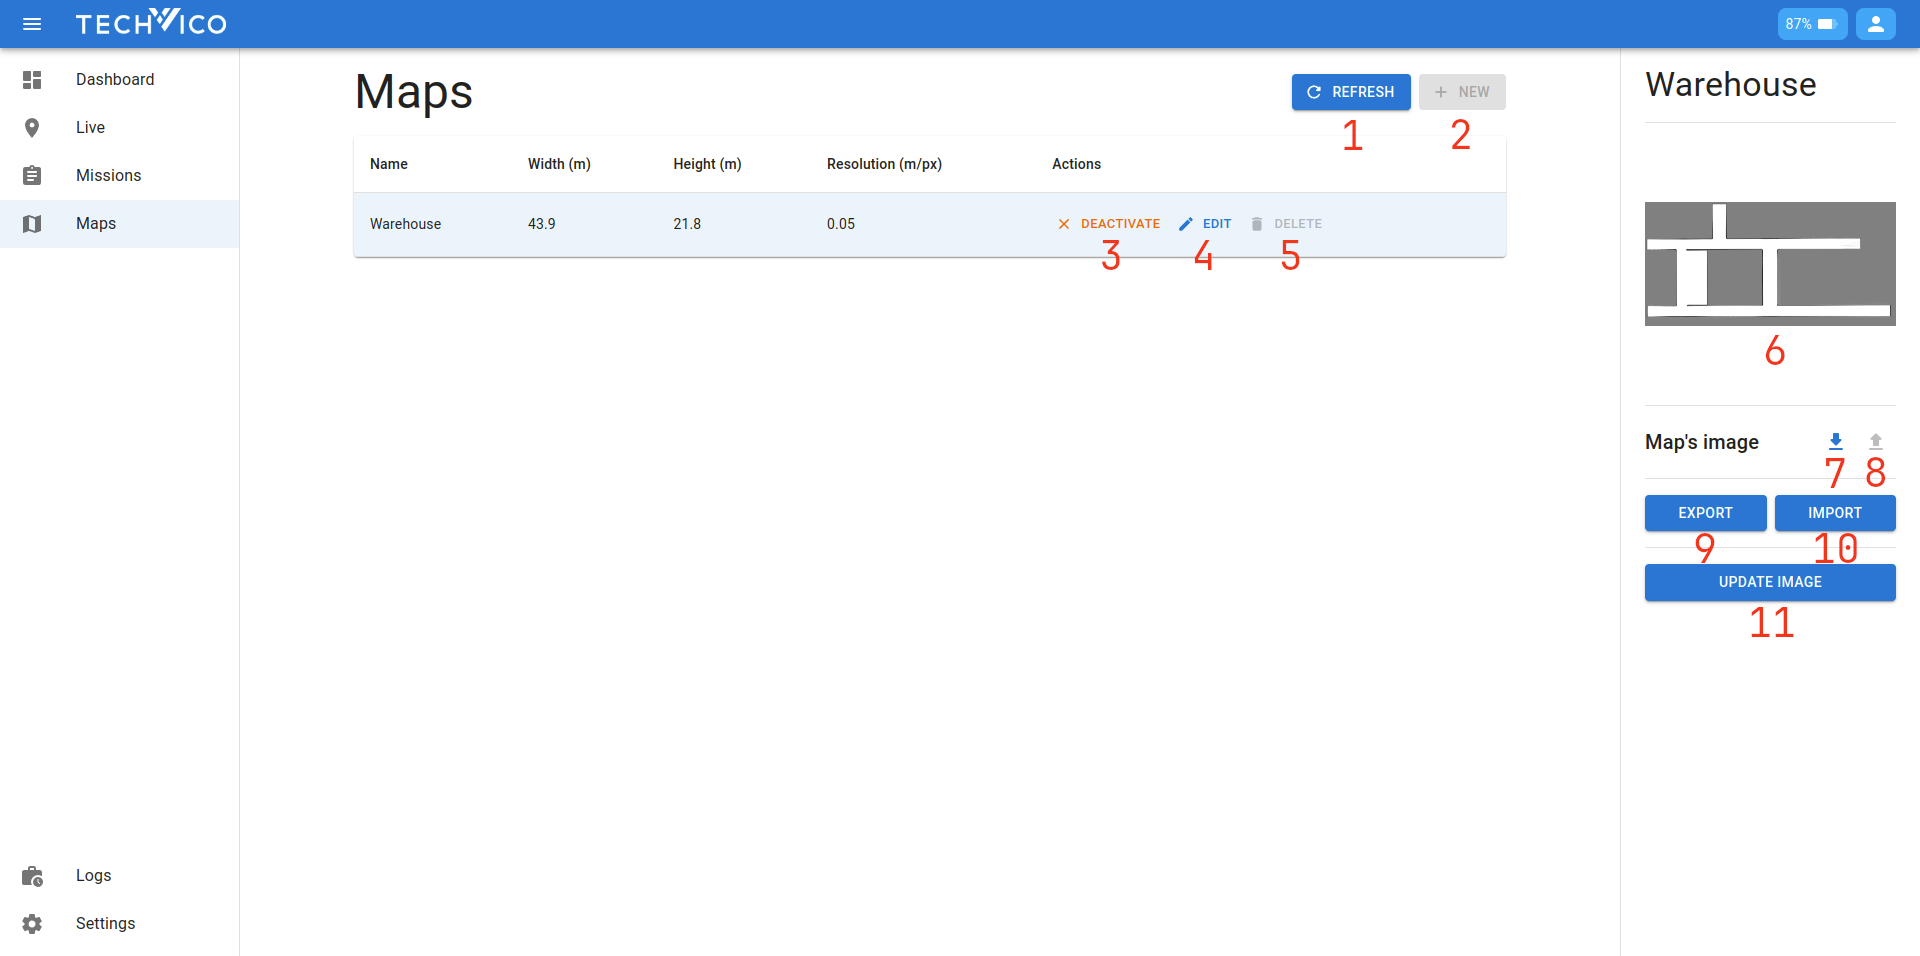
This page is for managing all the maps in the robot's database. You can click on the map in the table to select it, and the info bar will display the selected map's information. Now we will walk through all the components on the interface:
- Refresh: to manually fetch the latest data from the robot. The list is automatically refreshed every few seconds, so this button is mostly not needed.
- New: open the New map dialog
- Activate/Deactivate: use to choose the map that the robot is operating on. Only one map can be activated at any given time.
- Edit: open the Edit map page for that map
- Delete: delete the map
- The map's image
- Download map's image: download the map's image as png/jpeg file
- Upload map's image: update the map's image with a new one (not supported yet)
- Export: export map's markers, marker links, missions, et cetera, as a
tvcmapfile, which can be imported to other maps - Import: open Map's import dialog
- Update image: available for activated map only, generate a new image based on the current state of the internal system. This is for some advanced use-case only.
Map's import
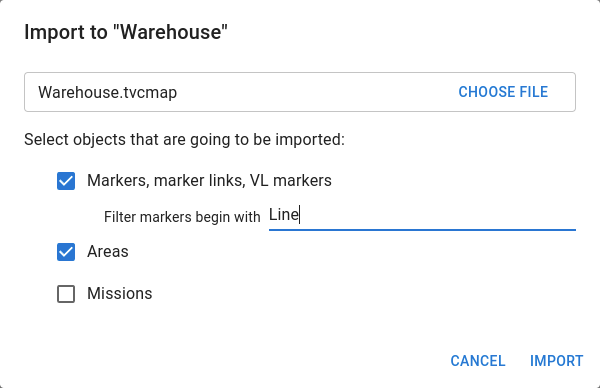
If you want to move markers, marker links, missions, et cetera, from one map to the other, you can use this export/import feature. Export a tvcmap file first, then use this import dialog to import it to another map.
The dialog is self explanatory. First you select a map, then you select what to be imported using the checkboxes. You can add a marker's prefix to manually control which markers is imported. If the prefix is empty, all marker links are also imported. Otherwise, only filtered markers are imported with no marker links.
New map
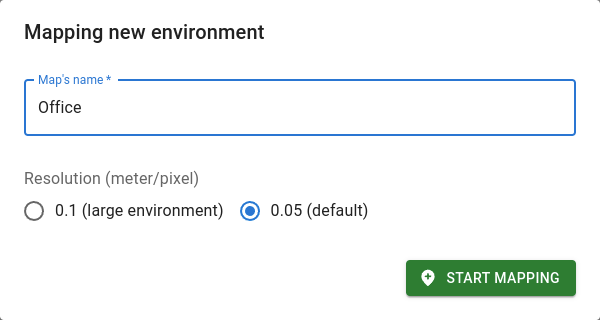
Before mapping a new environment, you have to decide the name and the resolution. We suggest to keep the resolution at default (0.05 meter/pixel). Then press the start mapping button, you will be redirected to the Live page.