Live
In the live page, you can see all the real-time data of the robot. In the center is the visualization of the current map, with all of it's markers, marker links. You can see the robot, and the point cloud from the lidar sensor as orange dots.
The visualization is fully interactive. You can use your mouse to arrange the map to your preferences:
- Hold the left mouse button or the mouse wheel button and drag to move the map around.
- Hold right mouse button and drag horizontally to rotate the map.
- Scroll the mouse wheel up/down to zoom in/out the map. You can also use the +/- buttons on the map for zooming.
Top bar

- Relocalize: the feature is explained in Relocalize
- Follow robot: makes the robot always displayed in the center of the view
- Follow robot direction: makes the robot direction always points to the north
- Fit the screen: arranges the map so it fit entirely in the view
- Grid: turns the overlay grid on/off
- Grid size: changes the grid size (unit: meter)
- Controller: turns the robot controller on/off
- Markers form: turns the Markers form on/off
- Update map: the feature is explained in Update map
Info bar
We will walkthrough each component of the info bar.
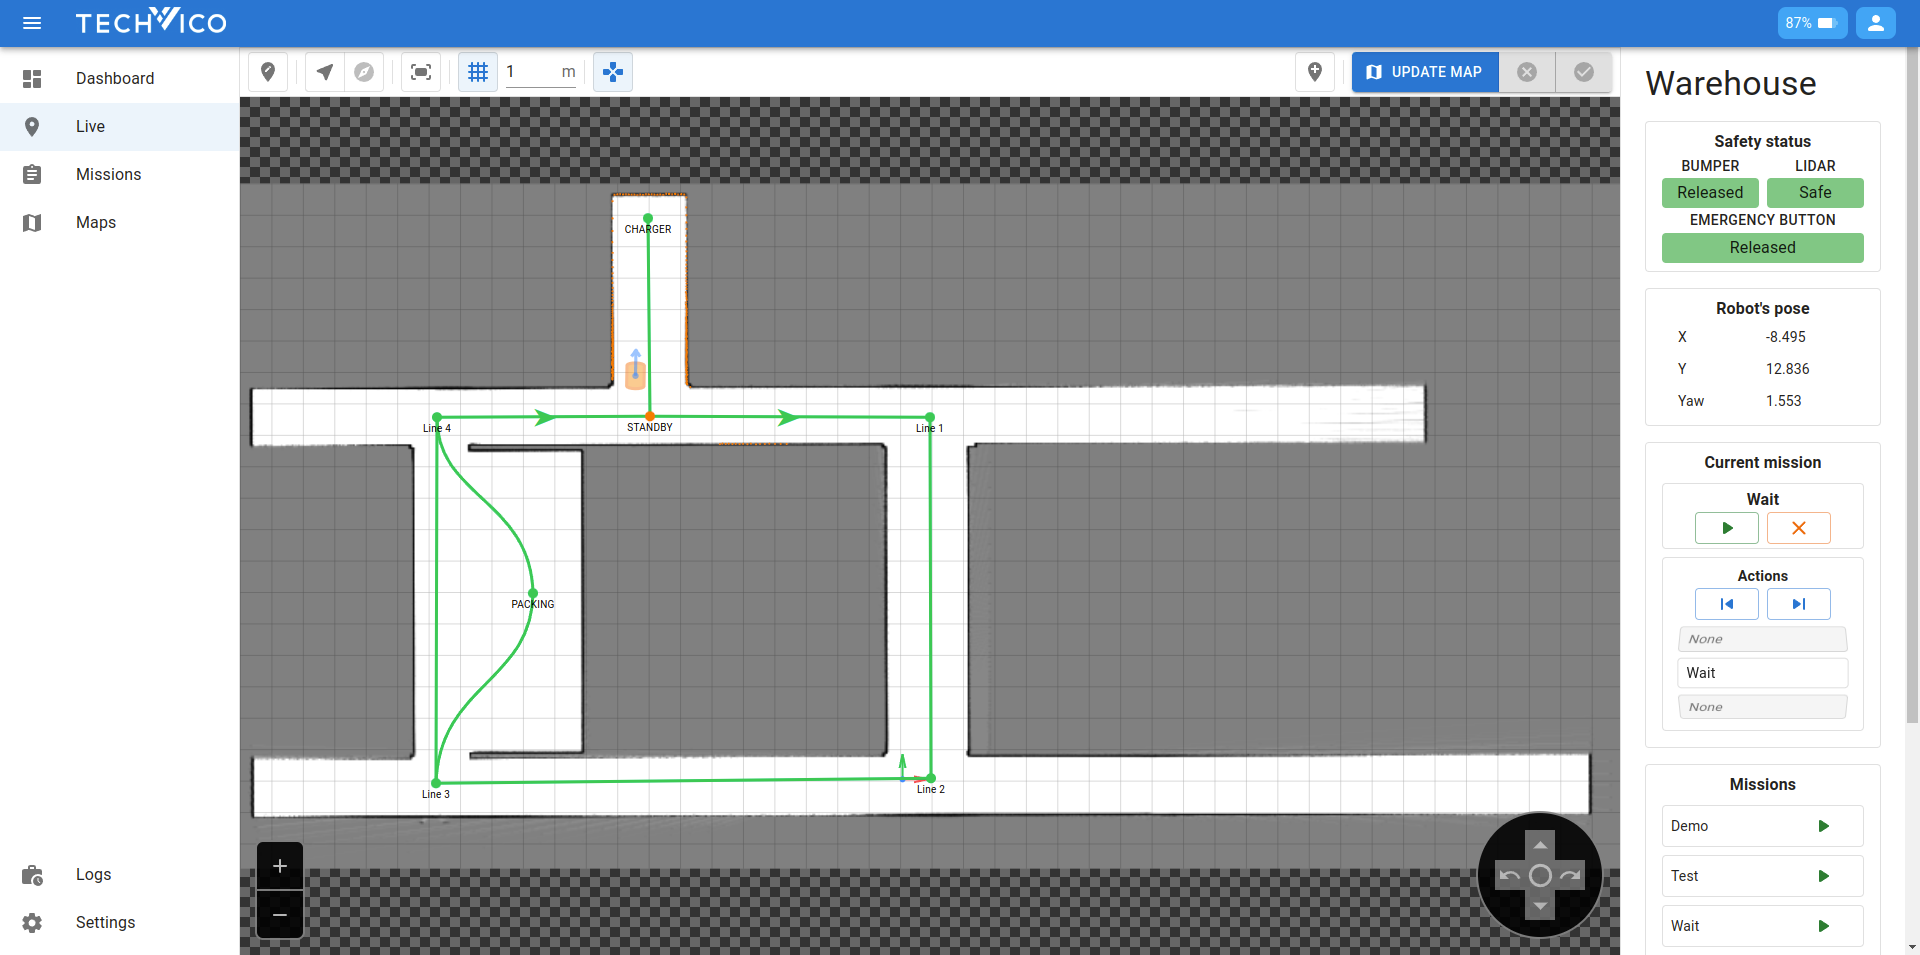
Safety status
Available values:
-
Bumper, emergency button:
- Pressed (robot stopped)
- Released
-
LIDAR:
- Safe
- Warning (robot slowed down)
- Stopped
Robot's pose

Current position of the robot
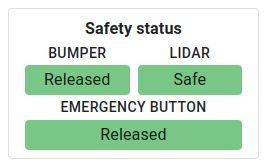
Current mission
Current mission information with the current executing action. Here are the buttons:
- Pause/resume: pause the current executing action, then resume later on
- Cancel: stop everything and finish early the current mission
- Undo: only available when pausing, stop the current action, and redo the previous one
- Skip: only available when pausing, stop the curernt action, and do the next one
Mission list

All available missions created on the map. Use the green button to execute it. If the robot is handling other mission, the executed mission will be put to the queue instead.
Missions queue

All queued missions, they will be executed from top to bottom. Use the clear button to empty the queue.
Markers form
The markers form is for doing some convenient adjustments on the markers, while the robot is operating. You can toggle on/off the form using the button on the top bar.
Update marker

In the drop down list, you will see all the markers on the map, sorted by distance to the robot. You can conveniently select the closest marker using the button. After a marker is selected, Press the Update Marker button to move the selected marker to the current position of the robot.
This feature is used when we want the marker's position to be very accurate (less then 5-10 cm). When we set the marker on the map, we cannot put it at that accuracy. After set it on the map, we can move the robot to the desired location, and use the feature.
Transform markers
![]()
This features is used when you want to move a batch of the markers with the same offset. You can also add the markers prefix to filter the targeted markers. Only markers with name starts with the prefix will be affected.
Record destination marker
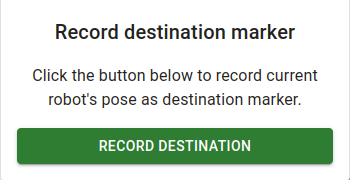
This feature is used when you want to add a new marker. The new marker will be added the the current position of the robot.
Controller
On the bottom right of the map is a robot's controller. You can toggle it on/off using the button on the top bar. You can use it to move the robot forward, backward, rotate left, rotate right. The center button is to quickly stop the robot.
To use it, press down and hold the left mouse button. You can press the Ctrl button on the keyboard to click on the button instead of holding it. By using the Ctrl button, you can also select multiple controller buttons. For example, you can use it to tell the robot to go forward and rotate left at the same time.
Moreover, while holding Ctrl button, you can also use arrow keys on the keyboard (↑ ↓ → ←) to control the robot.
Relocalize
Sometimes the robot can be mislocalized due to several reasons:
- When the robot just turn on, and it cannot automatically detect where it is.
- When the environment changes too much.
- When there are other physical issues, e.g., the surface is not flat.
Below is the image showing the robot is mislocalizing. The pointcloud (orange dots) does not match with the walls (black lines). In fact it is standing at point A and should be localized there.
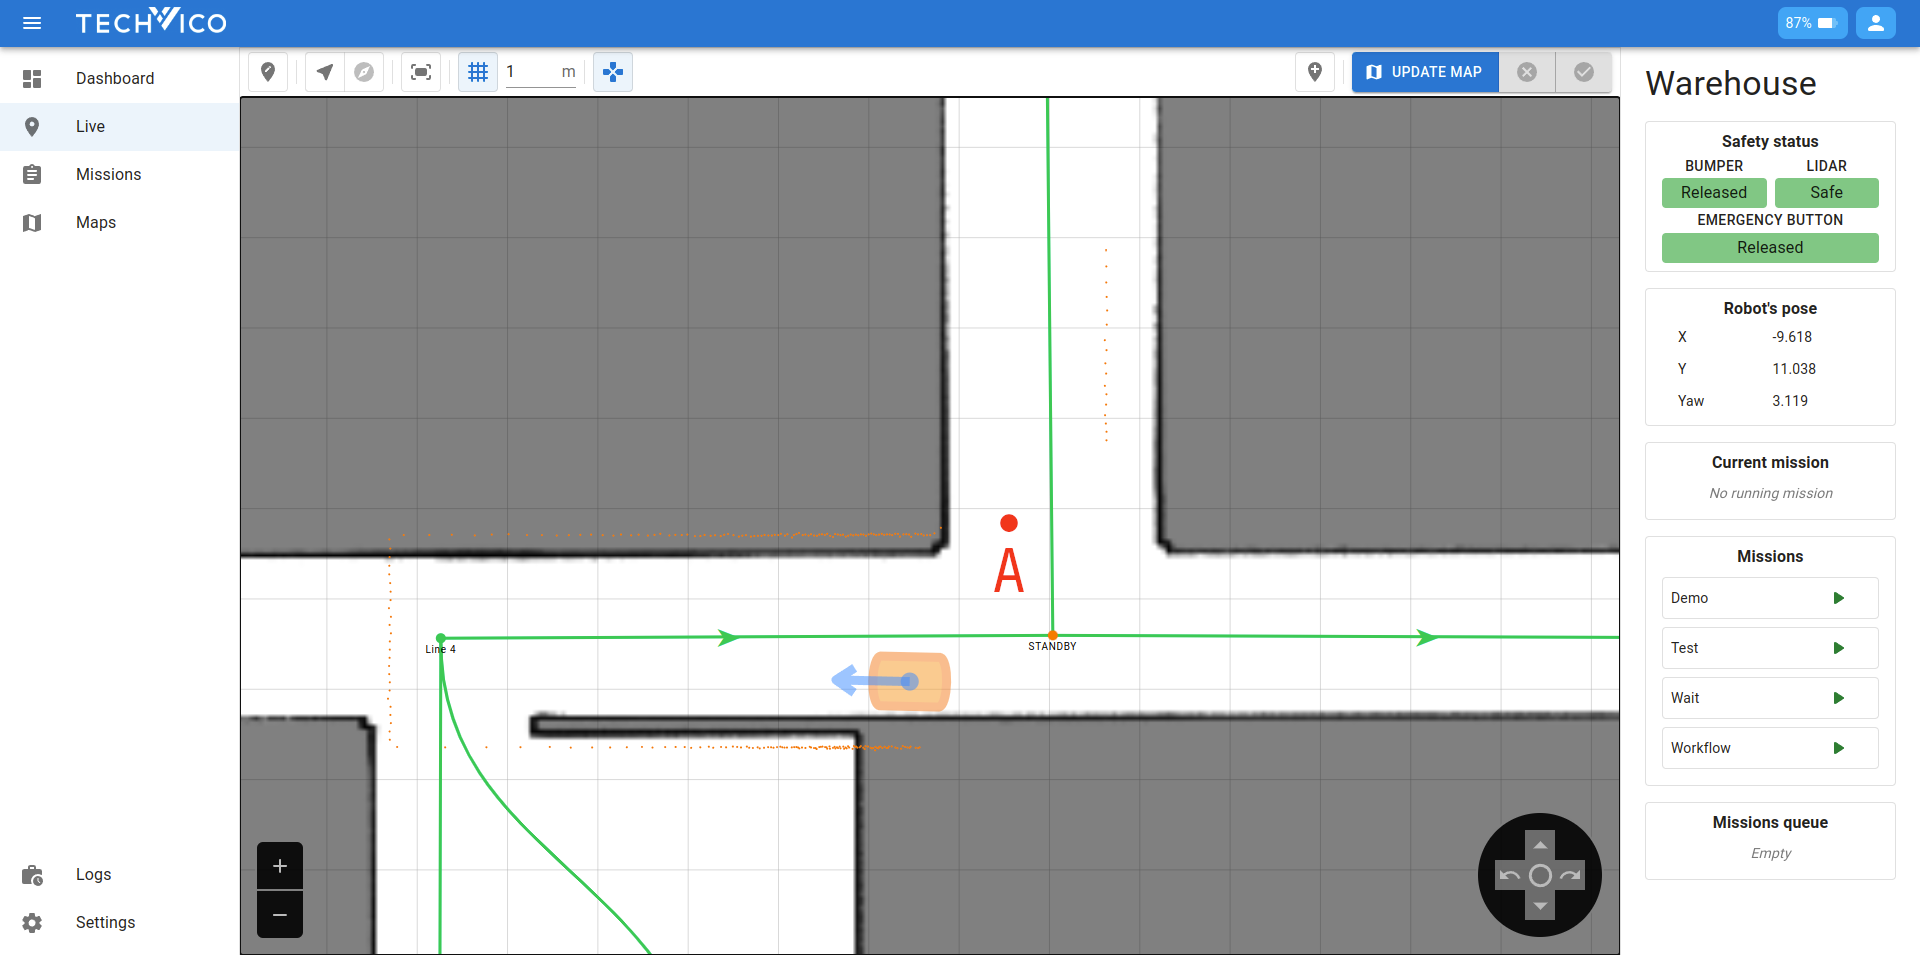
This is where the relocalize feature comes in. To use it, follow the steps below:
- Click on the Relocalize button on the top bar to activate the feature. You can also press the 1 key on the keyboard.
- Use the mouse to click on point A (where the robot should be).
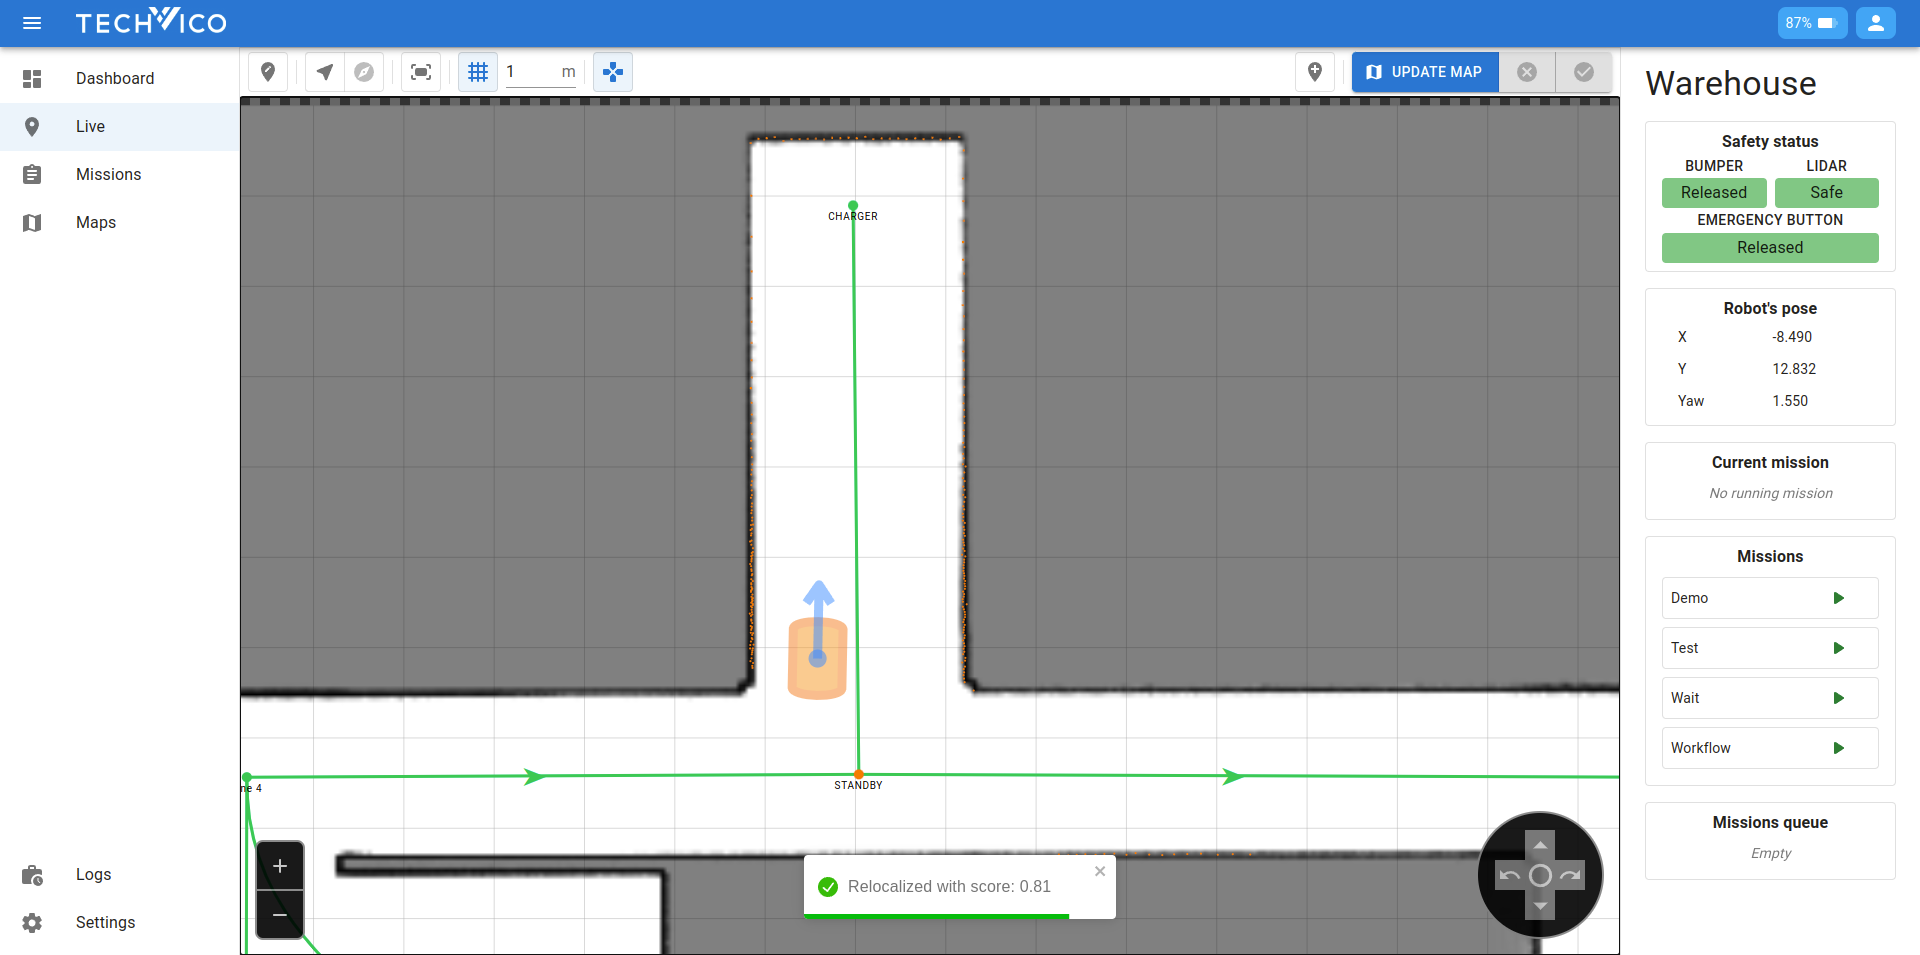
Then you will see the robot is relocalized. The pointcloud now precisely match with the walls. You can also see the relocalization score in the popup notification.
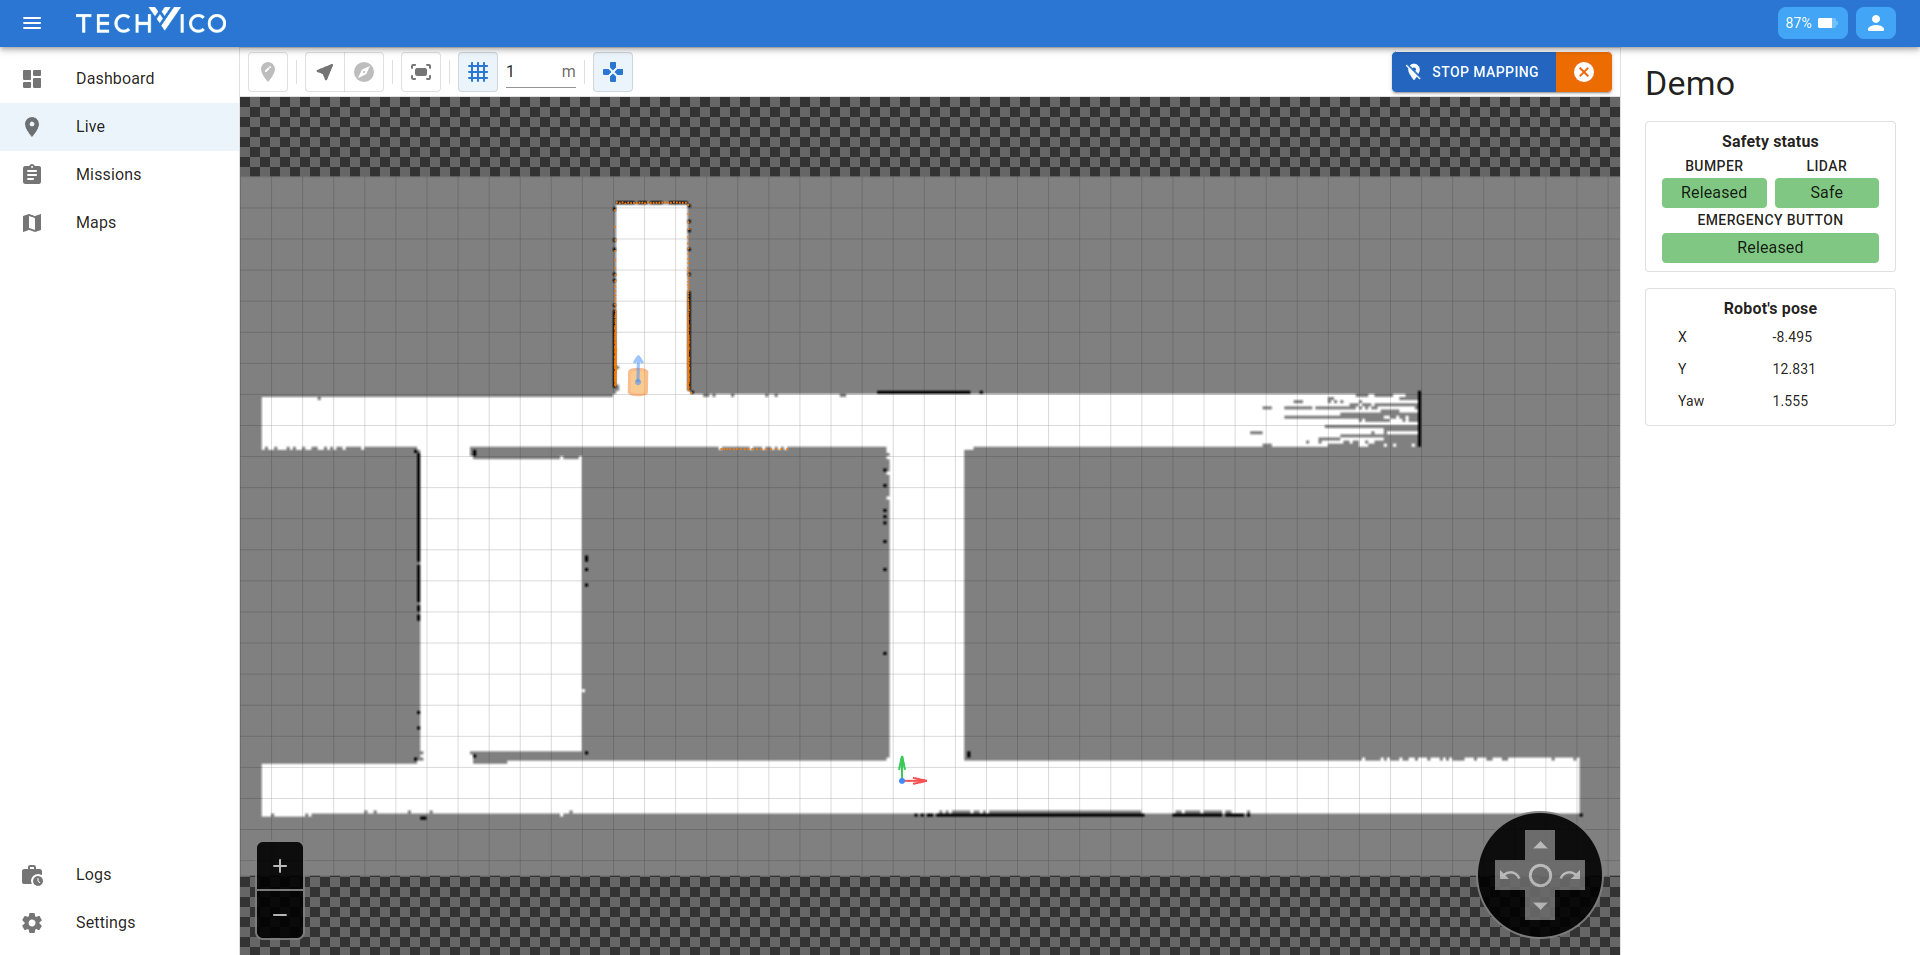
Mapping
Mapping is the process of navigating the robot through the area to capture data and generate a comprehensive map. This is essential for accurate navigation and operation within that environment.
When creating a new map, follow these guidelines to ensure the highest quality and accuracy:
- Consistent Speed: Move the robot at a consistent and moderate speed. Avoid sudden movements or changes in direction.
- Coverage: Ensure that all areas are covered thoroughly. Overlapping paths can help ensure no areas are missed.
- Environment Stability: Try to map when the environment is stable, with minimal movement of objects or people.
- Surface Conditions: Ensure stable surfaces for better sensor readings.
The live page is also used when the robot is mapping. Some features will not available when mapping including relocalization, missions-related features.
As you move the robot through the environment, the map will update in real-time. On the right of the topbar, you will find two important buttons:
- Stop mapping: Concludes the mapping process when you have covered the desired area. You will then proceed to the next step (Choose origin)
- Cancel: If you need to abort the mapping process for any reason, this button will cancel the mapping and discard the data.
Choose origin
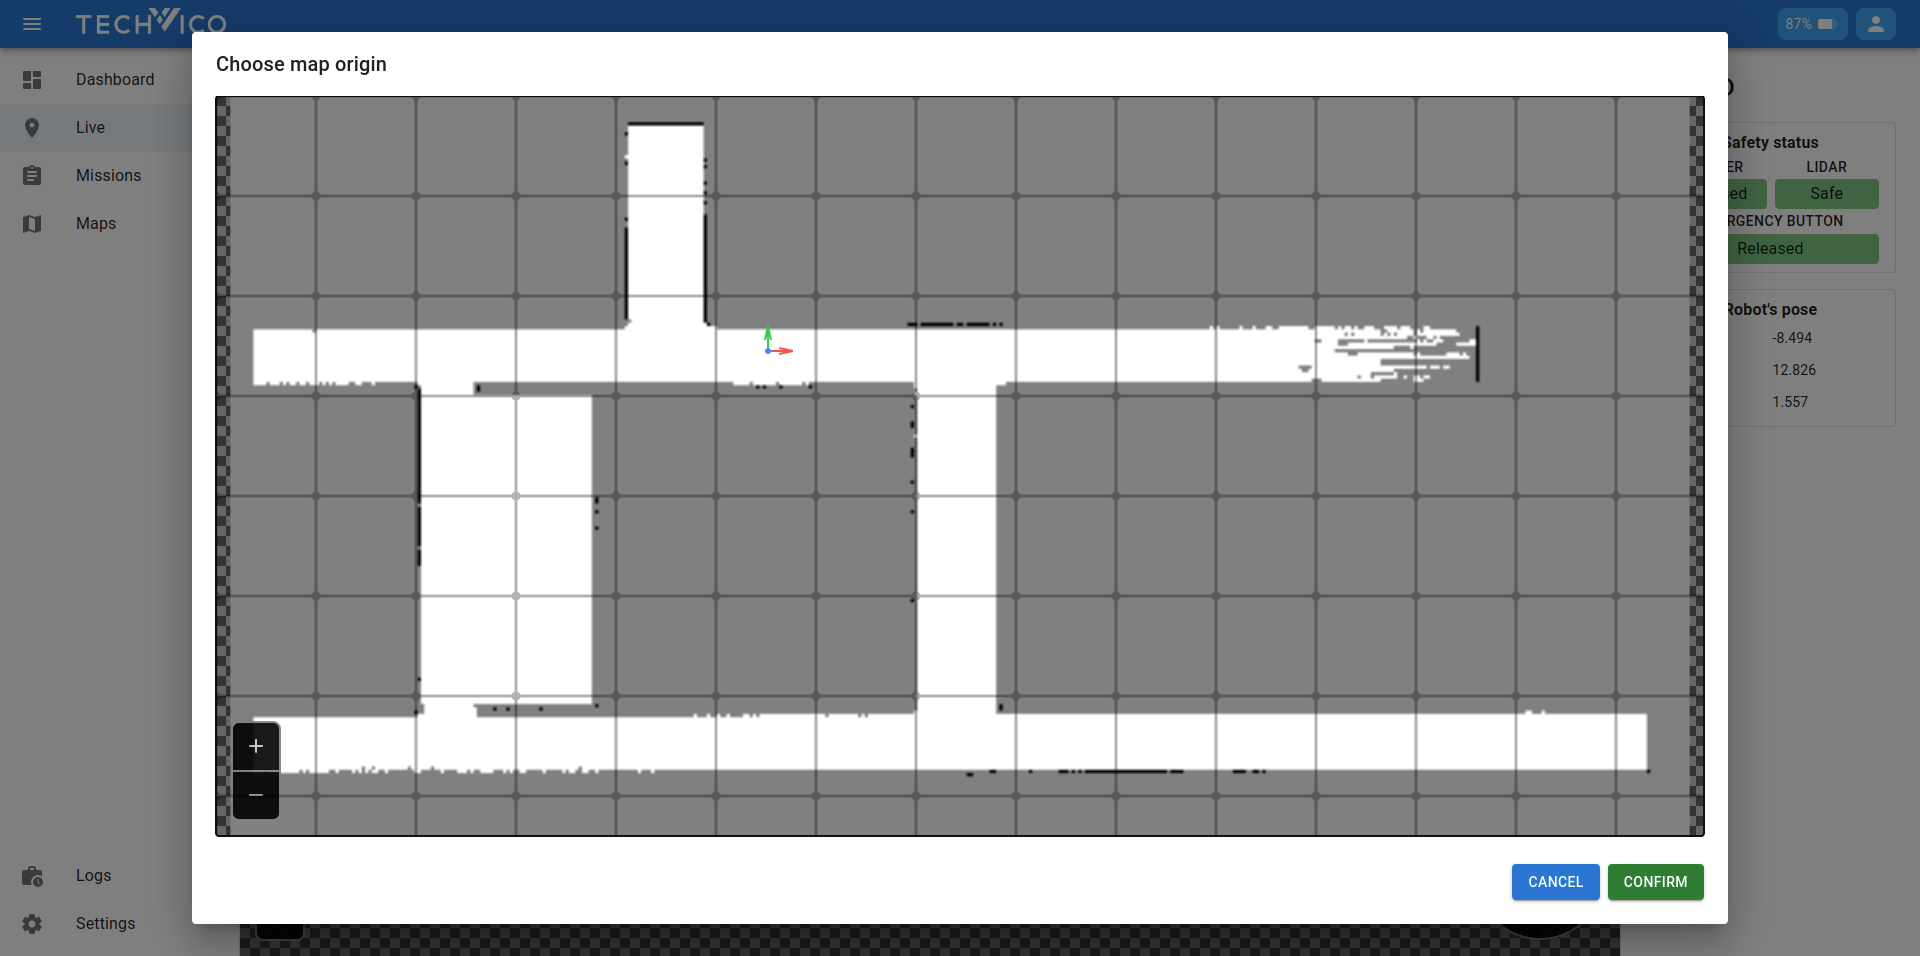
After stopping the mapping, you need to choose the origin point for the map. In the prompted dialog, you will see the same interactive map, but now your left mouse button will be used for choosing the origin. The process is as follow:
- Hold the left mouse button at where you want the origin is.
- Drag the mouse to where you want the x axis points to.
- Release the mouse to finalize the decision.
Confirm your selection once satisfied with the placement. You can redo this process multiple times if necessary. You can also press Cancel, which will take you back to the mapping process.
Once the origin is set, the new map will be saved. The robot will now be able to use this map for navigation and other operations.