Settings
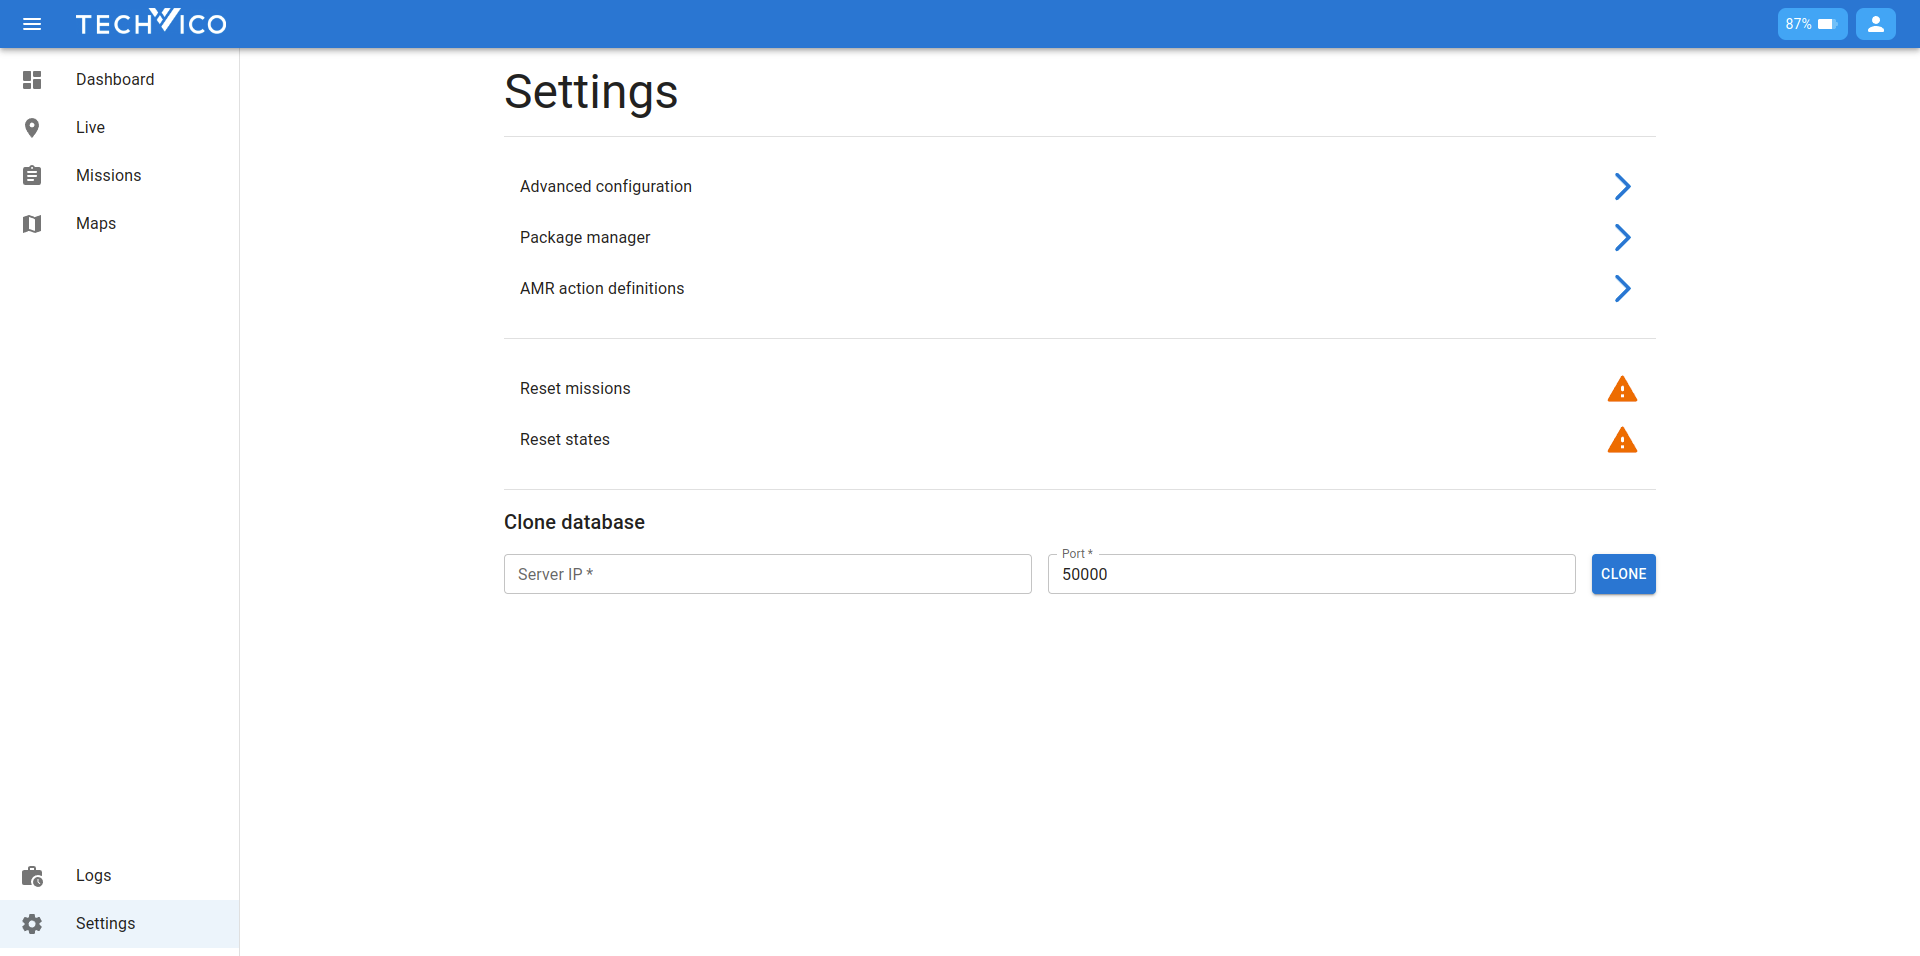
Hear you will find configurations for the robot. Advanced configuration, Package manager, Action definitions will be explained in their associated sections.
Reset system
Sometimes, when the system has synchronization issue, we have to use the reset buttons to do a soft reset of the current state.
- Reset missions: reset all missions status, clear mission queue, and cancel current mission
- Reset states: same as reset missions, deactive the current map, and do some additional cleanup
Advanced configuration
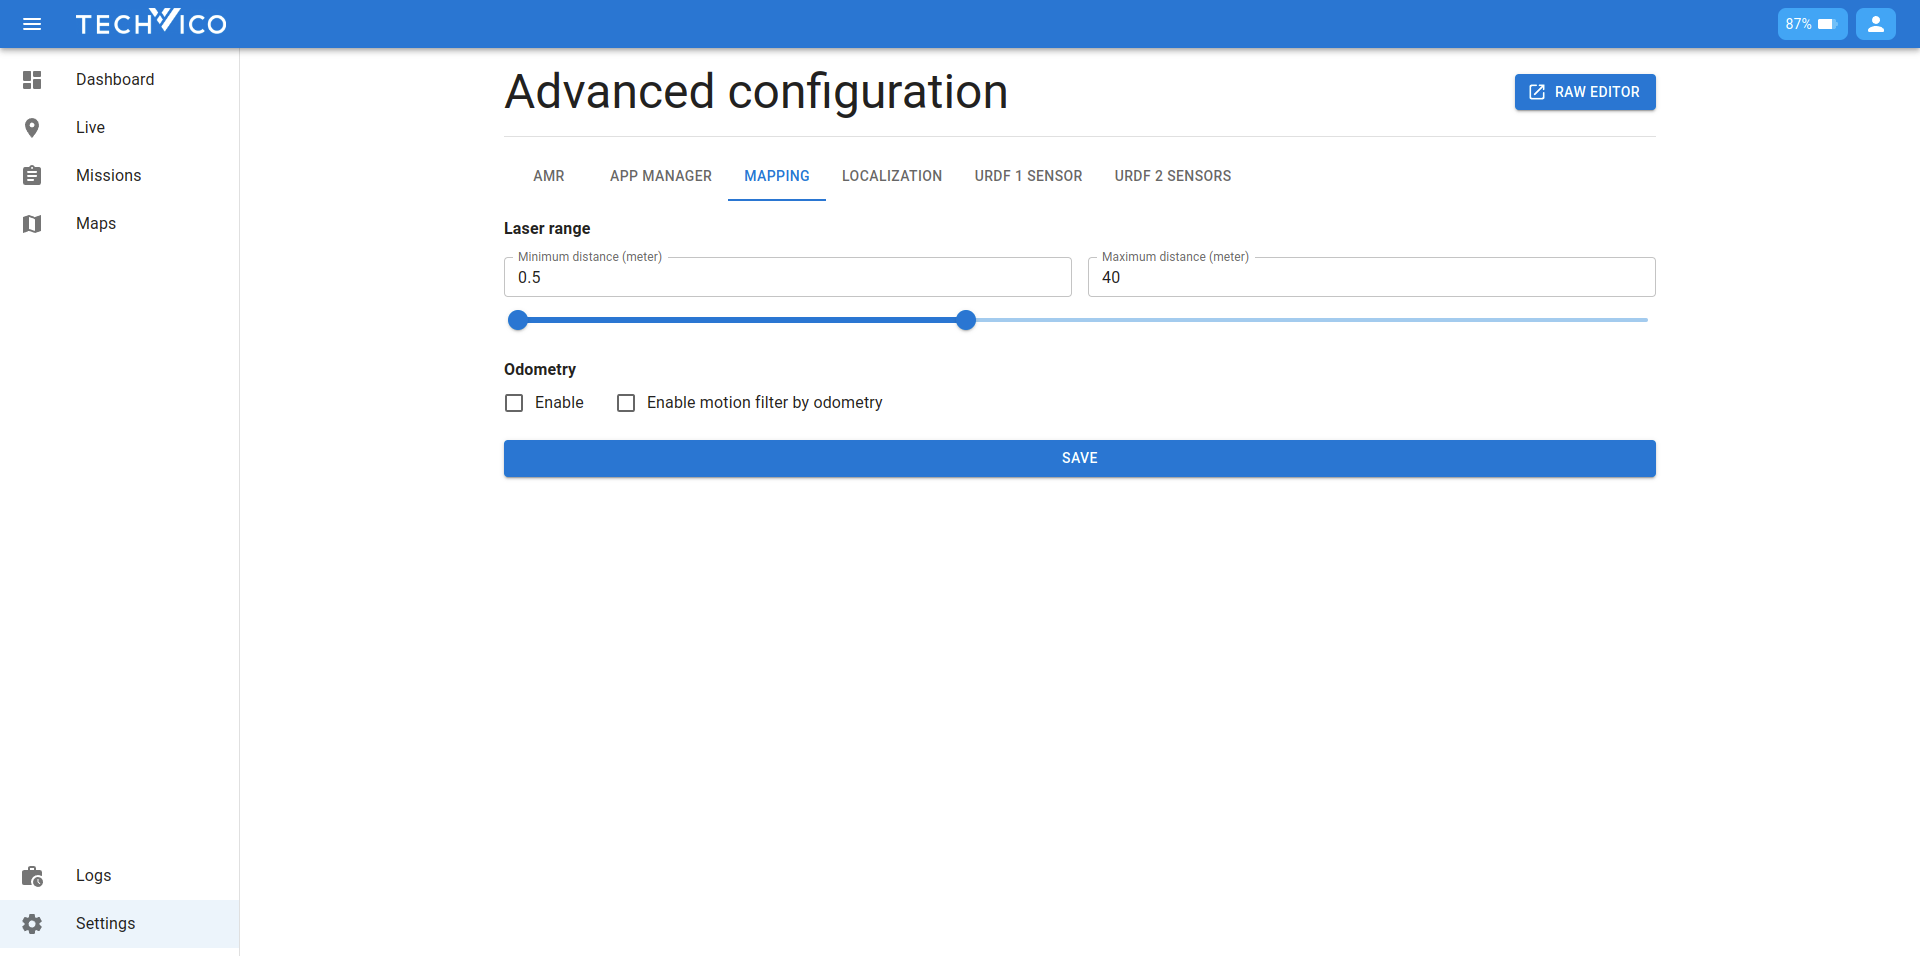
Here you will see available settings for the robot. Each tab will be handled separately, so you have to pess save before switching to any other tab. We will explain all the options below:
- AMR:
- Number of laser scanners: self explanatory, currently we support robots using 1 or 2 laser scanners
- App manager:
- Auto start: If enabled, when the robot turns on, it will try to activate the map and localize itself based on the state before it turns off last time. This is convenient when you want to setup the robot in a fully autonomous environment.
- Mapping/Localization: configs to be used when the robot is in mapping/localization mode
- Laser range: self-explanatory, you can use the text field, or drag the slider
- Odometry: self-explanatory, please refer to our TVC-NAV docs for explanation on terms like odometry, motion filter.
- URDF 1 sensor: used when robot is using 1 laser scanner (the
Number of laser scannersis 1)- Base link - laser scanner position: the offset values from the base link to the laser scanner's position
- URDF 2 sensors: used when robot is using 2 laser scanners, now we have 2 base link - laser scanner position configs
You can also access the raw editor page using the button on the top. The page gives you permission to modify every possible configuration, but most of the time you only need to use the regular Settings page.
Package manager
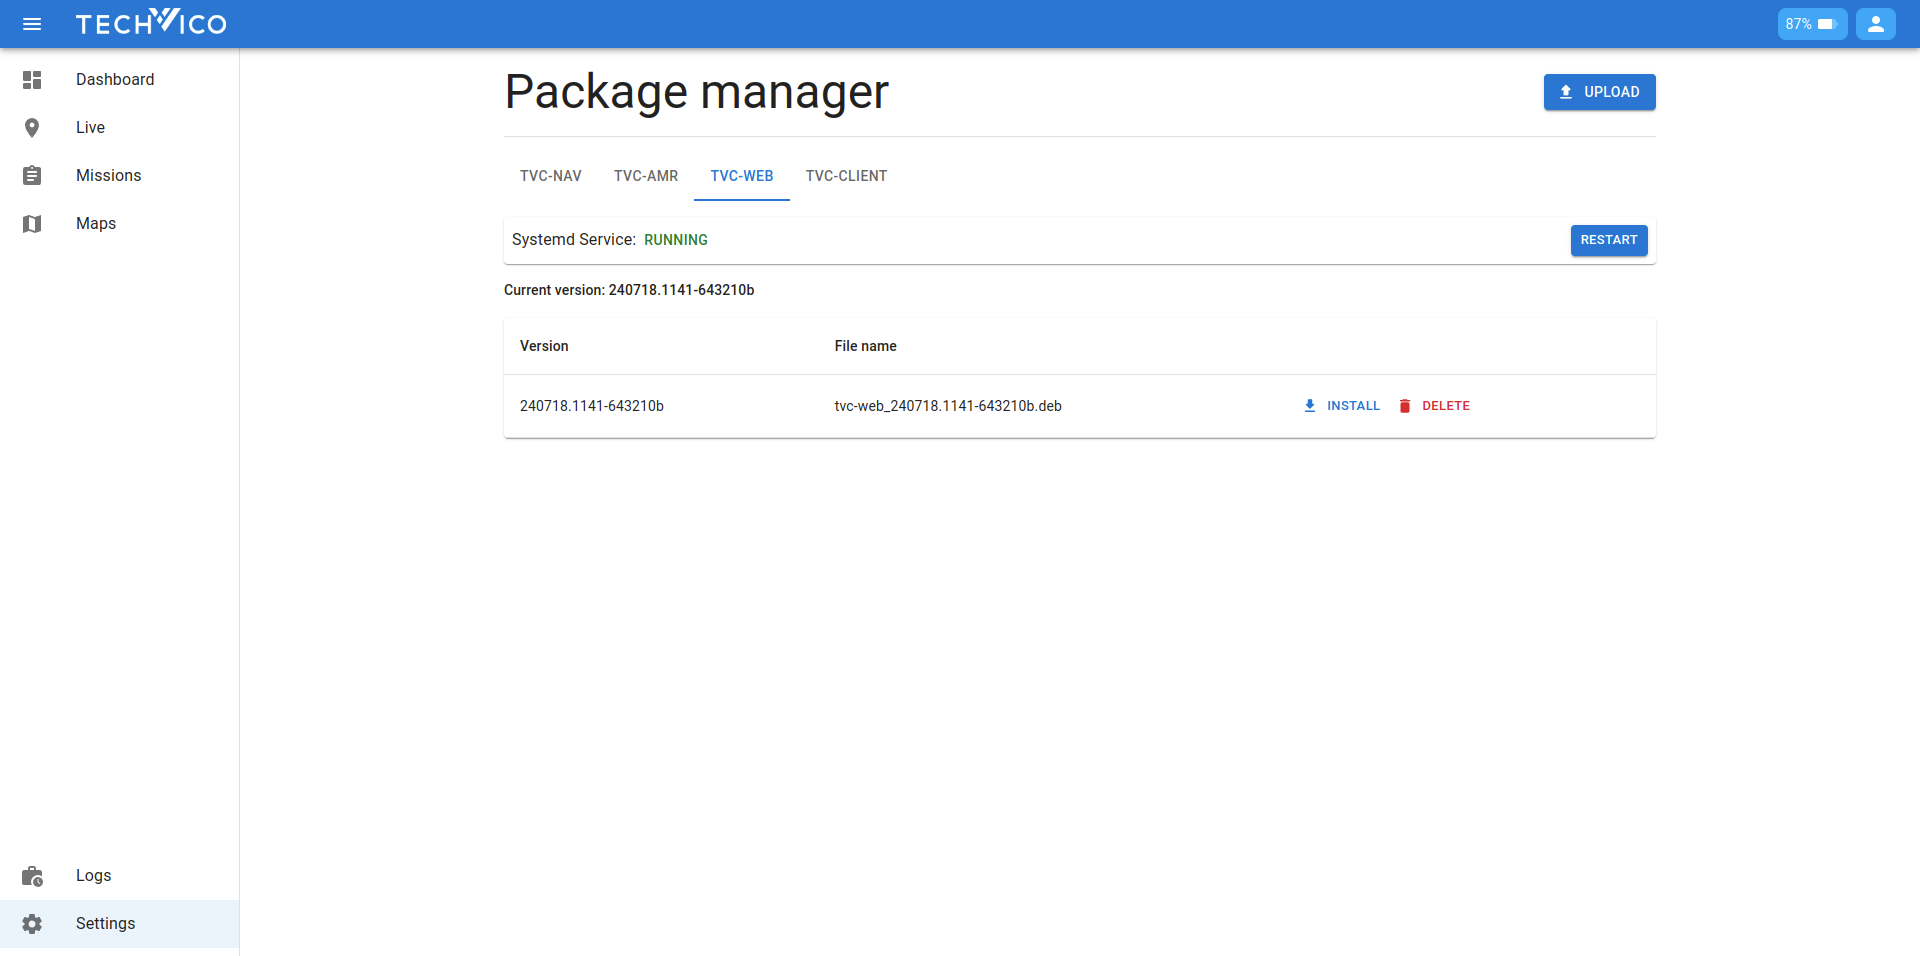
Our product relies on several key packages, with the two main ones being:
- TVC-NAV: This package handles the robot's navigation and localization.
- TVC-WEB: This package includes the web interface and related functionalities described in this user manual.
The Package Manager page allows you to view and manage the packages installed on your robot. Here’s a breakdown of what you can do:
-
View Package Information:
- Version: check the current version of each package.
- Status: check each package's status (e.g., running, stopped). If a package encounters errors or needs to be restarted for any reason, you can restart it using the Restart button.
-
Manage DEB Files:
- Upload: Users can upload DEB files for each package. These files are the installation files for the packages and can be uploaded directly from your local system.
- Stored Files: Uploaded DEB files are stored on the system for future use. You can view a list of all uploaded DEB files.
- Install: Once DEB files are uploaded, you can choose to install packages from these files. This is useful for updating packages to a new version or reinstalling a package if needed.
- Delete DEB Files: If a DEB file is no longer needed, you can delete it from the system to free up storage space.